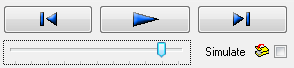
Use the motion simulation controls to show the movement of the cutting tool as it follows the toolpaths in the machining program. Press Play to starts and stops the continuous motion, or use the single step buttons to move the tool forwards or backwards one toolpath segment.
The slider underneath the buttons controls the display speed. The playback speed is 100% when the slider is at the midpoint, and increases or decreases to either side. There is another slider on the Tool Position window that can move to any point along the toolpath.
Use the keyboard shortcuts Ctrl+Space to start and stop, Ctrl+Right to move one toolpath segment forward, and Ctrl+Left to move one segment backwards.
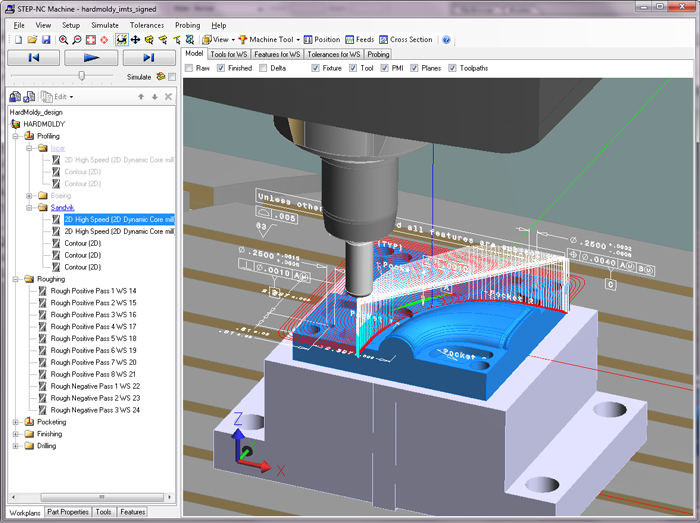
After one workingstep is finished, the playback will move to the
next one and will highlight the new workingstep in the tree display to
the left. You can change to a new workingstep at any time by just
clicking on it. When the toolbar shows that the geometry window is in
the  Move Tool mode, you
can to go to a specific toolpath position by clicking on it.
Move Tool mode, you
can to go to a specific toolpath position by clicking on it.
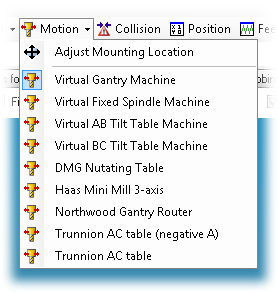 The
The  Motion toolbar menu
has a list of machine tool models. The Virtual tools have no extra
machine tool geometry to display, but they shift, tilt, and turn
either the workpiece or tool to satisfy the toolpath. By default, the
playback uses the Virtual Gantry Machine, which leaves the part fixed
in place and moves the tool as needed.
Motion toolbar menu
has a list of machine tool models. The Virtual tools have no extra
machine tool geometry to display, but they shift, tilt, and turn
either the workpiece or tool to satisfy the toolpath. By default, the
playback uses the Virtual Gantry Machine, which leaves the part fixed
in place and moves the tool as needed.
The other machine tool models have actual CAD geometry associated with them, and it may take a moment to load when you first select one. This list is expandable, and the machines installed on your computer may differ from the ones shown to the left.
By default, the motion simulator attempts to center the workpiece
on the machine table. You can fine-tune this placement by selecting
the  Adjust Mounting
Location menu item. This will bring up a small dialog with
controls for adjusting the X, Y, and Z position independantly.
Adjust Mounting
Location menu item. This will bring up a small dialog with
controls for adjusting the X, Y, and Z position independantly.