Overview
We have provided Visual Studio Templates and sample projects for C#, Visual Basic, and C++. The easiest way to start is to use the templates. This section shows how to configure a brand new Visual Studio project for use with the STEP-NC DLL.
The STEP-NC DLL has 32bit and 64bit versions. A project that uses only one version can add a reference to one of the DLLs and make sure that the solution platform matches (i.e. x86 for stepnc_x86, and x64 for stepnc_x64). For a project with both 32bit and 64bit versions, manually add conditional references to the DLL as described below.
Adjust the Solution Platform
First, create your project. In the project dialog, verify that the .NET Framework target is v4.5 or higher.
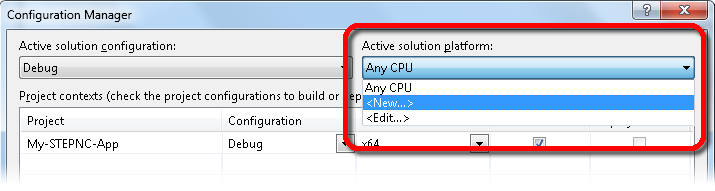
The STEP-NC DLL has 32bit and 64bit versions, but new VB or C#
projects default to "AnyCPU" as the solution platform. Right click on
the Solution and open the Configuration Manager. Under platforms,
select "New" to add "x86" or "x64". Next, select "Edit" and remove
the "Any CPU" platform.
Adding x86/x64 to your solution also adds them in the project, but if you have a complex series of sub-projects, you may need to cycle through them to make sure that they all match.
If you are creating a C++ application, go to the project properties dialog and make sure that under the "General" category, the "Common Language Runtime Support" is enabled (set to /clr). Also for C++ projects, the 32bit platform is called "win32" rather than "x86"
Add Reference — Single Platform
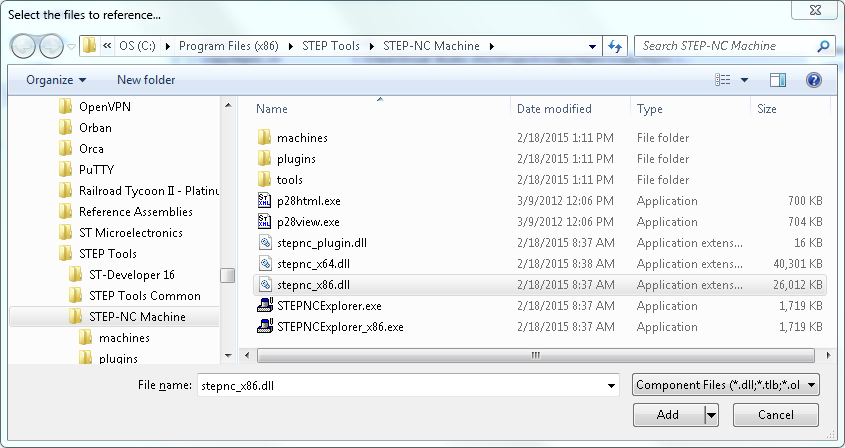
The last task is to add a reference to the STEP-NC DLL. If your project only builds one platform (32bit OR 64bit), you can just right-click on the project and select "Add Reference ...". Choose Browse and then navigate to the STEP-NC Machine installation directory and pick the appropriate version of the DLL.
If your project needs to build both 32bit AND 64bit versions,
follow the instructions in the next section.
After adding the reference, the STEPNCLib namespace is now available and you can begin using the DLL classes in your code.
Add Reference — Dual 32bit and 64bit Platforms
A project that needs build both 32bit and 64bit versions must use a conditional reference to use the 32bit STEP-NC DLL for the "x86" platform and the 64bit DLL for the "x64" platform. Visual Studio does not have a dialog interface for conditional references, so we must either use the STEP-NC project templates or manually few lines of XML directly to the project file.
Save and close your solution (File | Save All, then File | Close Solution). Next open the XML source for the project file (File | Open | File ... and then select the ".vbproj", ".csproj", or ".vcxproj" file).
Insert the following at the end of the file, just above the final </Project> tag:
<ItemGroup>
<Reference Include="stepnc" Condition="$(Platform) == 'x86'">
  <HintPath>$(ProgramFiles)\STEP Tools\STEP-NC Machine\stepnc_x86.dll</HintPath>
</Reference>
<Reference Include="stepnc" Condition="$(Platform) == 'x64'">
  <HintPath>$(ProgramFiles)\STEP Tools\STEP-NC Machine\stepnc_x64.dll</HintPath>
</Reference>
</ItemGroup>
For a C++/CLI project, replace the x86
platform name
with Win32
instead.
After adding these references, the STEPNCLib namespace is now available in both platform configurations and you can begin using the DLL classes in your code.